Mailchimp is a famous email showcasing instrument that offers a structure developer. Be that as it may, this developer has restricted elements and customization choices. Adding a custom buy in structure gives you greater adaptability and develops your email list.
In this article, we will tell you the best way to make a Mailchimp buy in structure in WordPress with custom fields.
Adding a membership structure to your WordPress site is an extraordinary approach to speaking with your clients.
You can send bulletins, new item deliveries, declarations, and other data while making an immediate association with your crowd.
Mailchimp is one of the most famous email promoting administrations. It assists you with building an email list, send messages, and set up robotized email crusades. Furthermore, it likewise offers a structure manufacturer that you can use to make a membership structure and implant it on your site.
Nonetheless, Mailchimp's structure developer is extremely essential and doesn't offer a ton of customization choices. You get restricted structure fields to look over, and there are no settings to change tone, text style, and that's only the tip of the iceberg. It likewise adds Mailchimp marking at the base.
Making a custom Mailchimp buy in structure gives you greater adaptability and control. You can add a wide range of structure fields, alter their appearance, add restrictive rationale to show fields in view of the client's reactions, and that's just the beginning.
That being said, we should take a gander at how you can make a Mailchimp membership structure with custom fields.
Making a custom Mailchimp buy in structure gives you greater adaptability and control. You can add a wide range of structure fields, alter their appearance, add restrictive rationale to show fields in view of the client's reactions, and that's only the tip of the iceberg.
That being said, we should take a gander at how you can make a Mailchimp membership structure with custom fields.
The most straightforward approach to adding a Mailchimp buy in structure in WordPress is by utilizing WPForms. It is the best contact structure module for WordPress that is utilized by north of 5 million experts.
WPForms is a novice well disposed module that offers a simplified structure developer, prebuilt layouts, and loads of customization choices. The best part is it effectively coordinates with Mailchimp.
To begin with, you should introduce and initiate the WPForms module. On the off chance that you really want assistance, if it's not too much trouble, see our aide on the best way to introduce a WordPress module.
Upon enactment, you should go to WPForms » Settings and add the permit key. You can find the key in your WPForms account region.
In the wake of entering the permit key, feel free to tap the 'Verify Key' button.
Next, you will need to install the Mailchimp addon.
You can do that by going to WPForms » Addons from the WordPress admin panel. From here, navigate to the Mailchimp addon and click the ‘Install Addon’ button.
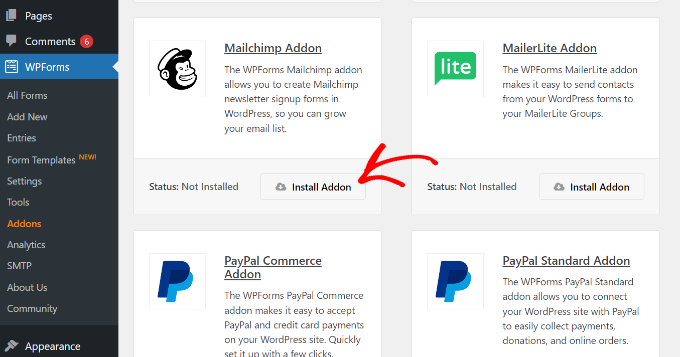
The addon ought to now introduce and enact.
Whenever that is finished, just go to WPForms » Settings from your WordPress dashboard and change to the 'Mixes' tab.
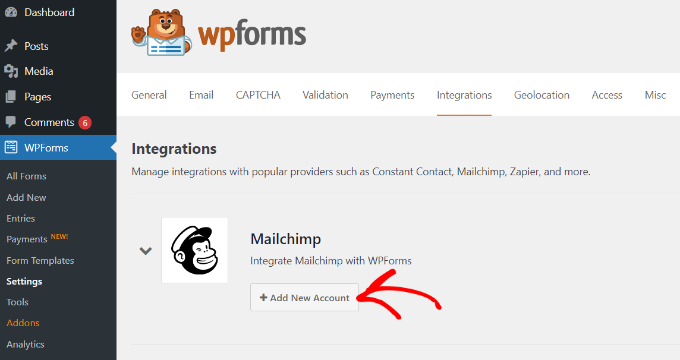
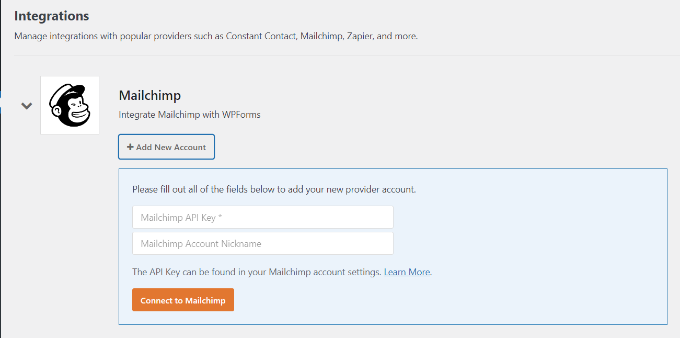
Next, you can expand the Mailchimp settings and then click the ‘+ Add New Account’ button under Mailchimp.
As soon as you do that, you will see more options. To integrate Mailchimp, you must enter the API key and account nickname. This will allow WPForms to communicate with your Mailchimp account.
Creating Mailchimp API Keys for WPForms Integration
To create an API key to connect WPForms, you will first need to log in to your Mailchimp account.
Once you are logged in, simply click on your avatar in the top right corner and select the ‘Account & billing’ option.
![]()
On the next page, you will see different account settings.
Simply click the ‘Extras’ dropdown menu and then select the ‘API keys’ option.

Next, you can copy an existing API key to use for your WPForms integration.
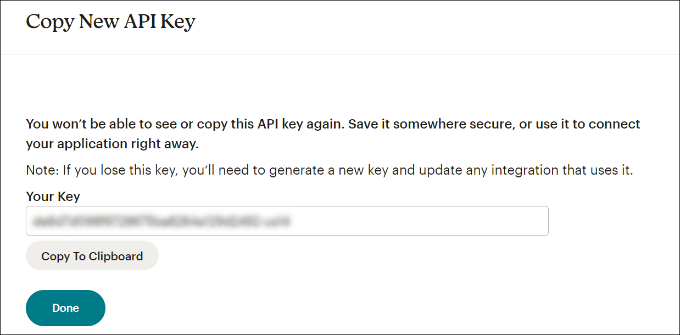
If you haven’t generated a key previously, then simply click the ‘Create A Key’ button.

After that, you can enter a name for your new API key.
Once that’s done, just click the ‘Generate Key’ button.

Then, you will see the new Programming interface key.
Feel free to duplicate the key and snap the 'Done' fasten.
Duplicate the Programming interface key
You can now get back to the program tab or window with your WPFroms reconciliation settings.
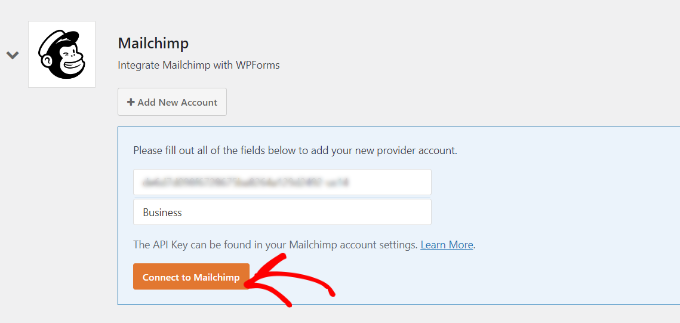
From here, basically glue the key into the 'Programming interface Key' field. You can likewise add a Mailchimp account epithet to recall which account you are associated with.
Enter your Mailchimp Programming interface key
In the wake of entering the key, feel free to tap the 'Associate with Mailchimp' button.
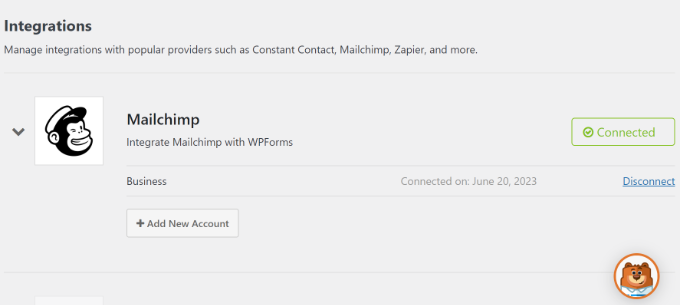
You ought to now see a green 'Associated' button close to the Mailchimp settings, showing that the email promoting device is effectively incorporated with WPForms.
See Mailchimp association
Stage 2: Plan a Mailchimp Buy in Structure With Custom Fields
Since you have incorporated Mailchimp with WPForms, the following stage is to make a membership structure with custom fields.
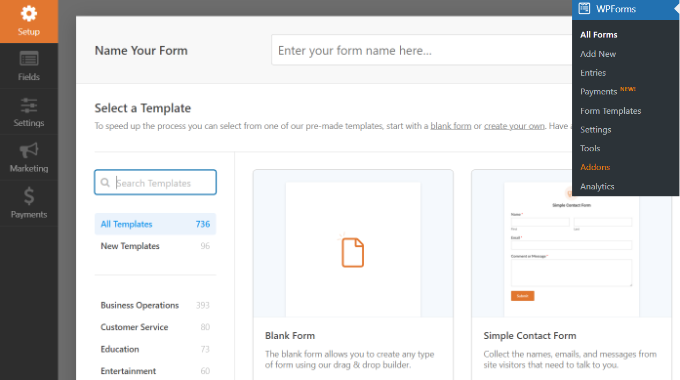
To start with, you should go to WPForms » Add New from the WordPress dashboard. Then, you can enter a name at the top and select a structure format.
Select a structure layout
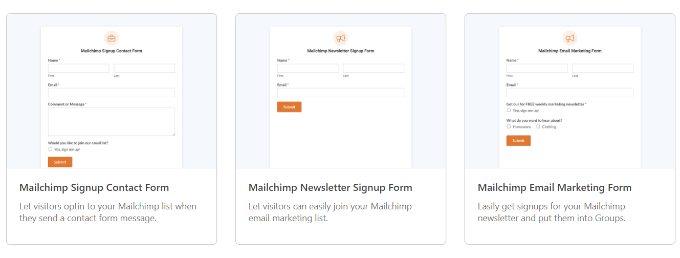
WPFomrs offers bunches of prebuilt structure layouts, so you can rapidly pick one and tweak it.
It even offers structure layouts for Mailchimp. For example, you can make an information exchange contact structure, pamphlet information exchange structure, or email showcasing structure.
Mailchimp structure layouts
For this instructional exercise, we will pick the Mailchimp Pamphlet Information exchange Structure layout.
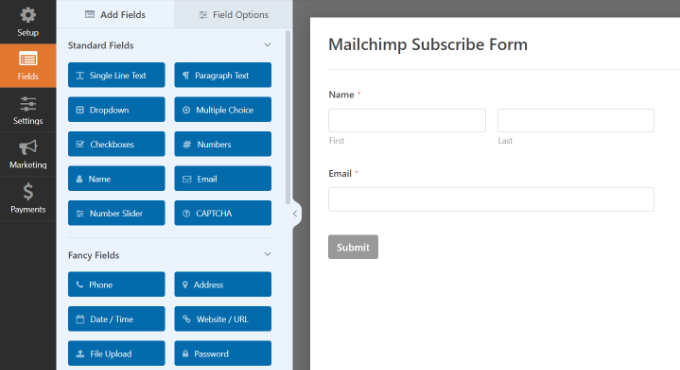
On the following screen, you will see the WPForms simplified structure manufacturer. Here, you can modify the structure and add custom fields from the menu on the left.
Add custom structure fields
The default structure format will accompany a Name and Email field.
Nonetheless, you can just drag any structure field and drop it onto the layout. There are fields to add message, dropdown choices, different decision, telephone number, address, date and time, site, secret word, and that's only the tip of the iceberg.
For example, on the off chance that you are utilizing a business telephone administration, you can add a Telephone field. This will assist you with sending SMS messages or contact endorsers by means of calls.
Adding custom structure fields
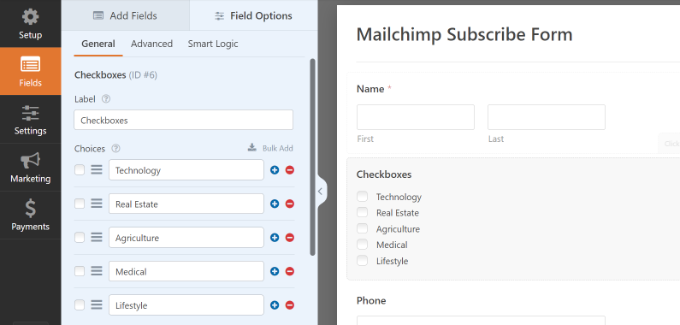
You can add a checkbox field and permit clients to choose their inclinations. Along these lines, you can portion your endorsers and send them designated messages.
Then, you can additionally alter each structure field in the format. Basically pick a field, and you will see more choices in the left board.
For instance, we changed the choices in the Checkboxes structure field.
Modify each structure field
You can likewise alter the mark of the structure field, make it a necessary field, add pictures to the checkbox choices, and that's just the beginning.
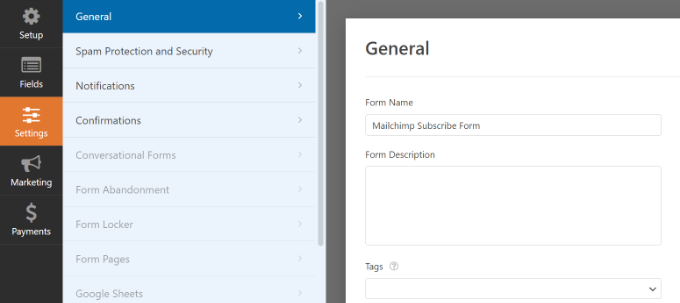
Whenever you have completed the process of adding custom structure fields, change to the 'Settings' tab from the left menu. In the Overall settings, you can change the structure's name and depiction, add labels, alter the submit button text, and that's only the tip of the iceberg.
General structure settings Mailchimp
Then, you can change to the 'Affirmations' tab and pick what supporters will see once they present a structure.
WPForms allows you to show a message, a particular page like a thank you page, or divert clients to a URL.
Affirmation settings Mailchimp structure
From that point onward, you can go to the 'Advertising' tab from the left board and afterward select Mailchimp.
From here, just snap the 'Add New Association' button.
Add new Mailchimp association
Then, a little popup will open where you should enter the Mailchimp epithet.
In the wake of entering it, feel free to tap the 'alright' button.
Enter association moniker
Then, you can pick the Mailchimp account that you associated with before.
Basically click the 'Select Record' dropdown menu and pick your record.
Select your Mailchimp account
From that point forward, more choices will show up.
You can feel free to choose the crowd from the dropdown menu to which the new supporters will be added.
Select crowd and activity
There are various activities to browse, however we will choose the 'Buy in' choice for this instructional exercise. This will add the client as another contact to your Mailchimp account.
Then, you can look down to see extra settings. For example, there is a choice to pick the WPForms field where clients can enter their email addresses.
Extra Mailchimp settings in WPForms
You likewise have choices to add labels to new endorsers and a note to the client's profile.
On the off chance that you look down further, you will see more discretionary settings. For example, you can empower twofold pick in, mark the supporter as celebrity, update their profile in the event that the contact is as of now in a group of people, and that's only the tip of the iceberg.
More Mailchimp settings in WPForms
Presently, you are prepared to add your Mailchimp buy in structure to your WordPress blog or site.
In the WPForms structure manufacturer, you will see an 'Implant' choice at the top. Feel free to tap on the 'Save' button to store your changes, and afterward click the 'Install' button.
Save and implant your structure
Then, a popup will open where you should choose a current page or make another page.
For this instructional exercise, we will utilize the 'Make New Page' choice.
Implant a structure in page
From that point onward, you should enter a name for your new page.
Whenever that is finished, just snap the 'How about we Go!' button.
Enter name for structure insert page
Then, you will see a review of your structure in the WordPress content manager.
You can then tap the 'Distribute' button at the top to cause your Mailchimp to buy in structure live.
View review of buy in structure
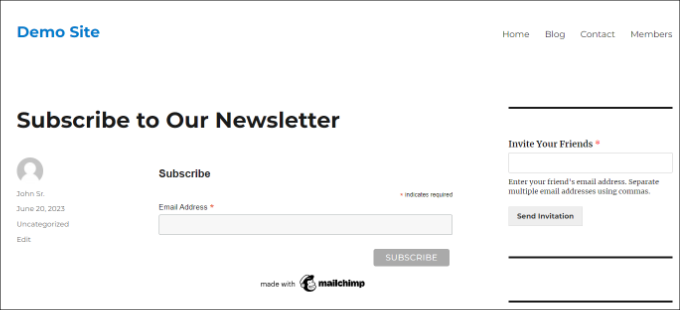
You have now effectively made a Mailchimp buy in structure with custom fields.
You can feel free to visit your site to see the structure in real life.
Mailchimp buy in structure with custom fields see
You can likewise do much more with Mailchimp and WordPress. For example, you can coordinate it with OptinMonster and show your buy in structures in popup crusades.
To find out more, kindly see our definitive manual for utilizing Mailchimp and WordPress.
We trust this article assisted you with figuring out how to make a Mailchimp buy in structure in WordPress with custom fields. You may likewise need to see our aide on simple methods for developing your email list quicker and our master picks for the high priority WordPress modules to develop your site.